How to DIY a Faux Concrete Fireplace on a Budget
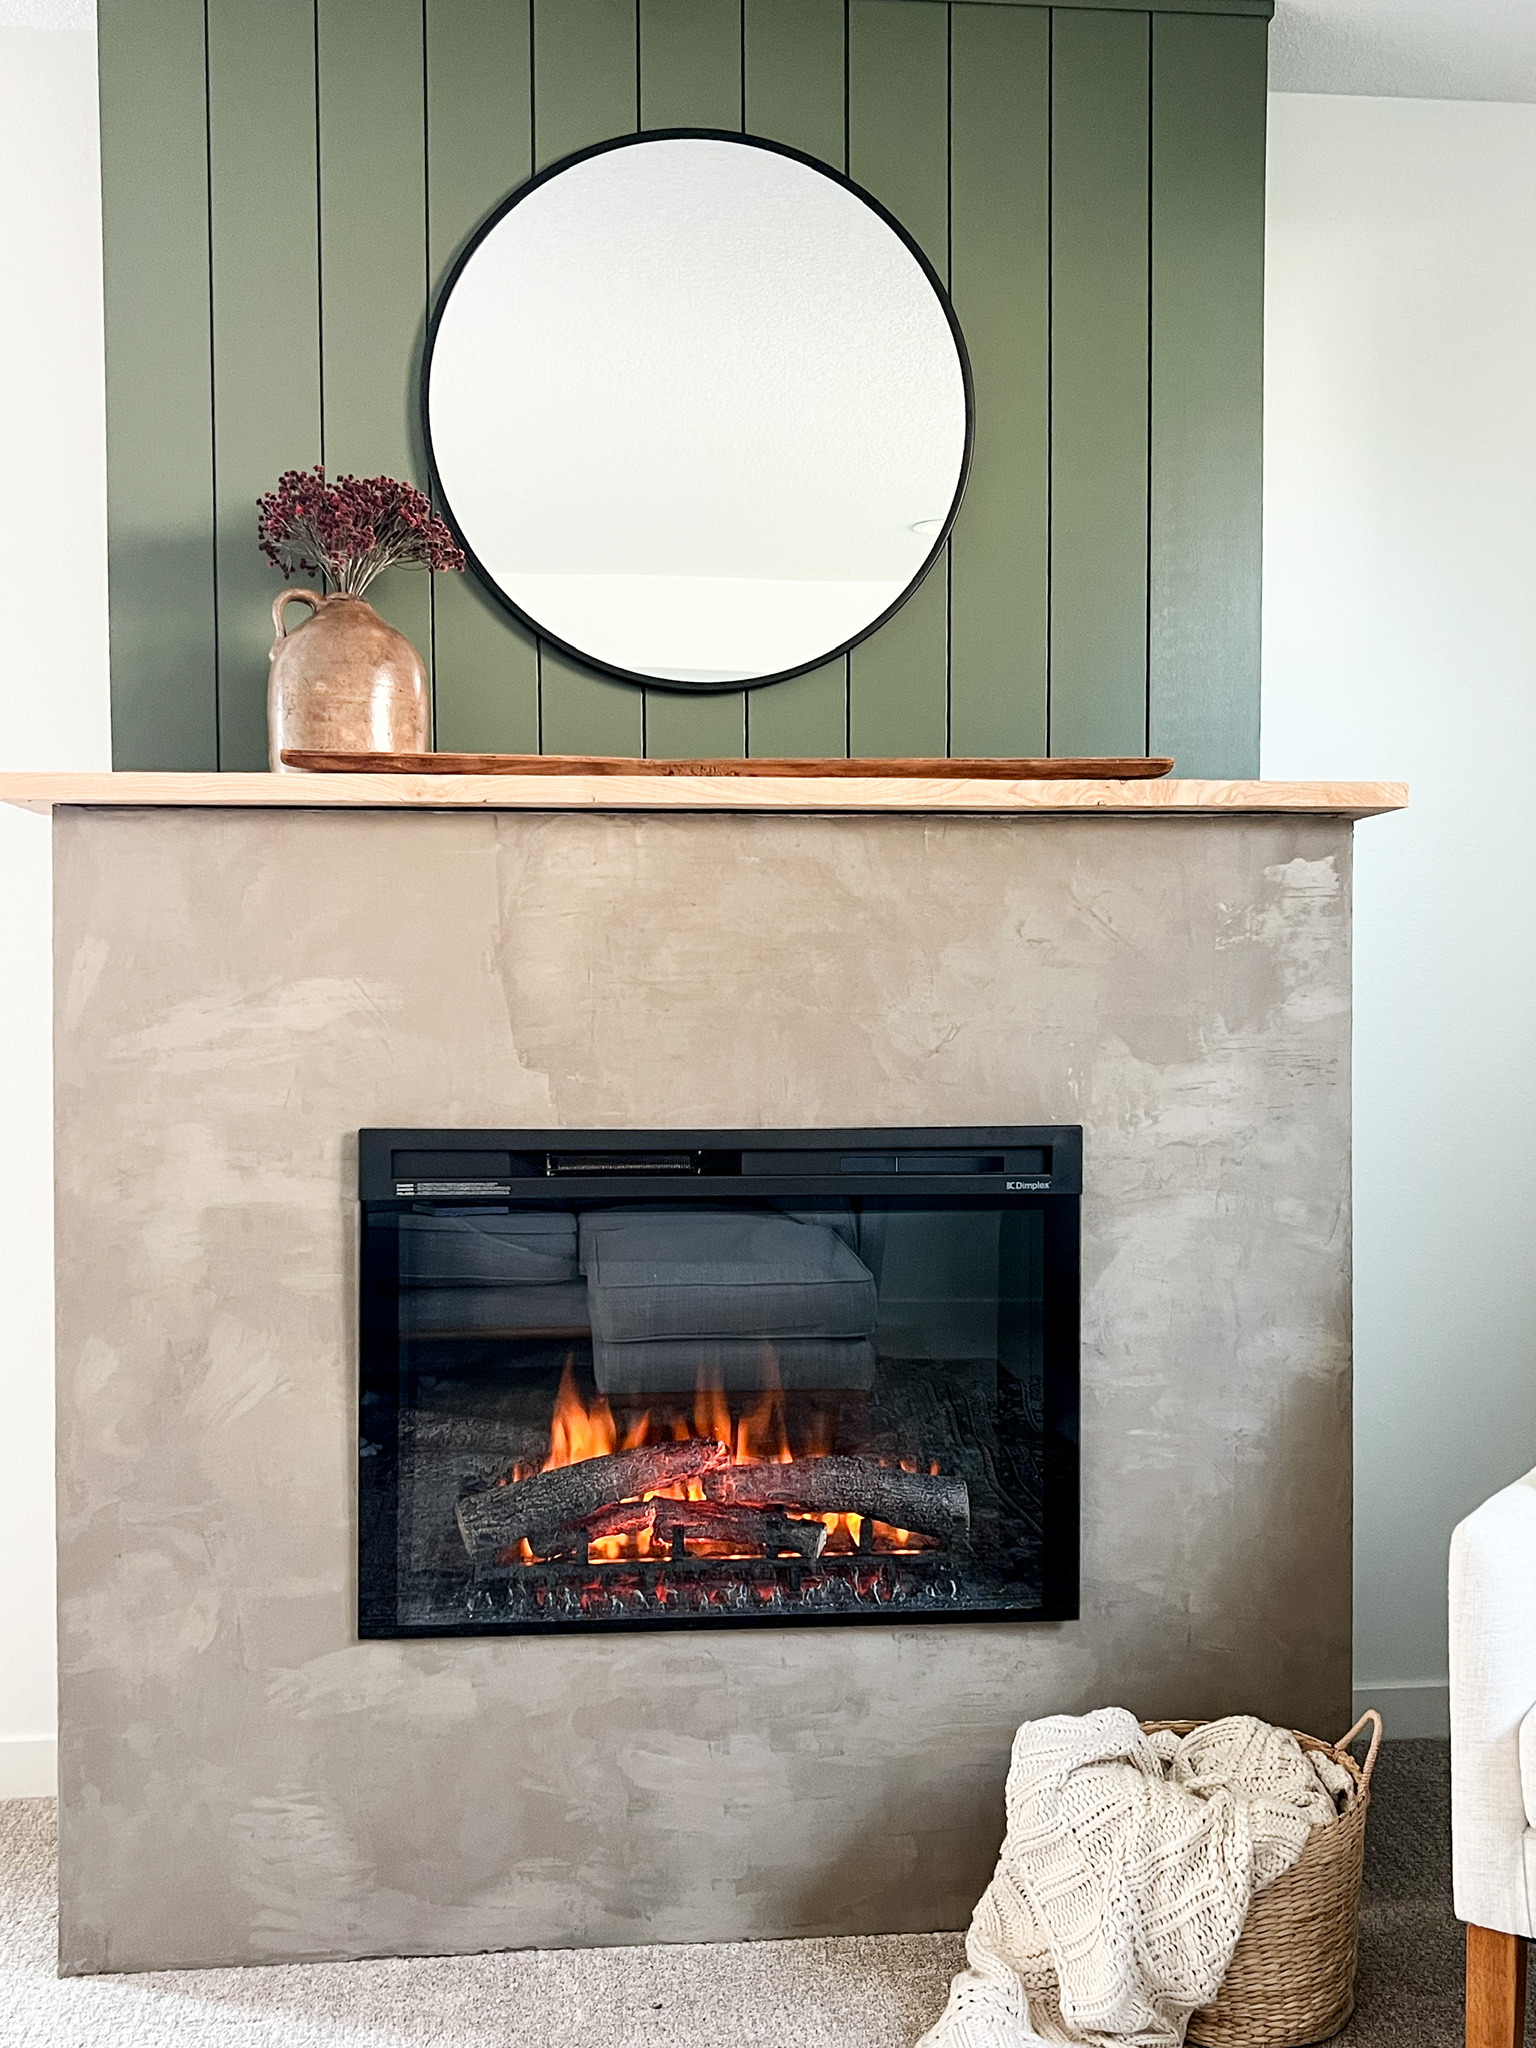
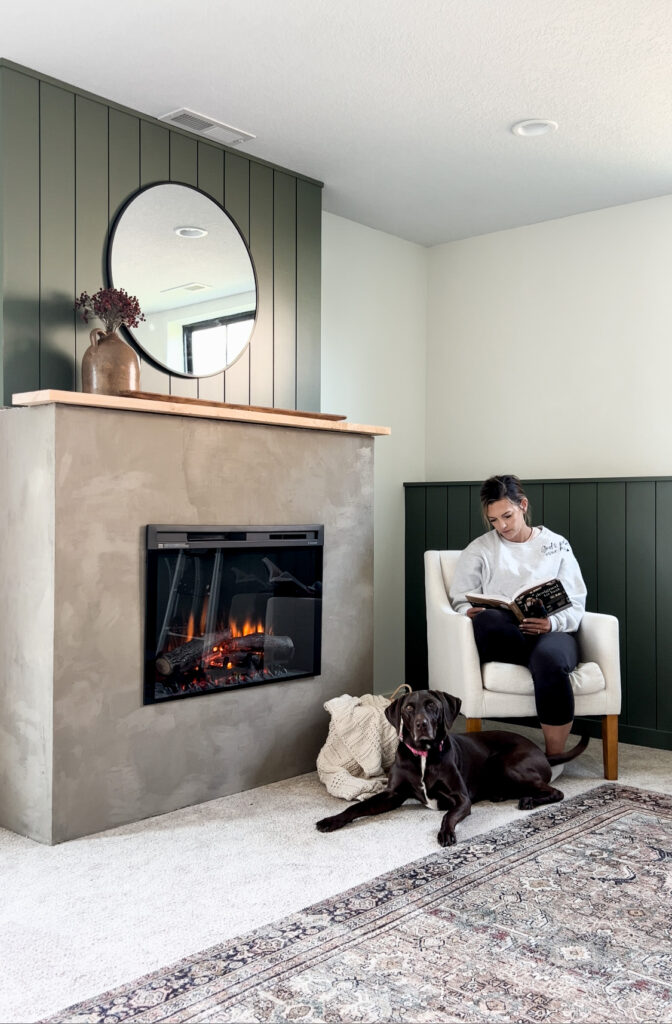
Whether you’re building a new home or remodeling your current home, one thing is for sure- fireplaces seem to always be a focal point in the living room. And for good reason! There are many finishes you can choose for your fireplace, but if you’re going for a more unique look, I have good news! I discovered how to create the most beautiful (and cost efficient!) concrete fireplace surround using Ardex feather finish. I was going for a more modern look, but I also wanted to make sure it fit the current theme of our home. I’m so pleased with how this turned out, and I’m excited to give you a step-by-step tutorial.
This post may contain affiliate links that I may earn a small commission on.
Project Supplies
Since we didn’t have a fireplace, I had to build our entire fireplace from scratch. I don’t want to overwhelm you with too much information at once, so this post is primarily about obtaining the concrete look. I’m going to share with you the best materials to obtain the faux concrete look around the fireplace opening. You could do this all over to create an entire concrete fireplace if you wanted, but as you can see in the photos, I chose to do the top half using different material.
To build out the base I used:
- 2×4’s
- 1/4″ Cement Board
- Metal Corner Bead
- Mesh Tape
To achieve the real concrete look I used:
- Putty Knife
- Damp Sponge
- Sandpaper
- Ardex Feather Finish
If you don’t already have a fireplace insert, the first step is to decide whether you are going to have a gas fireplace or an electric fireplace. If you decide on gas, that will require extra venting done by an HVAC expert. We chose to do electric so it was easy to just plug it in and have a “fire”. We also knew this fireplace wouldn’t be used a lot because of it’s location. This is the insert that we ended up using.
Faux Concrete Fireplace Steps
Step 1:
First, I measured the insert (there were exact measurements in the user manual so I just double checked them) and then built out the frame of our fireplace using 2×4’s. I’m not going to give you the exact dimensions of our fireplace, because your fireplace is going to depend on your insert size and the size of your space.
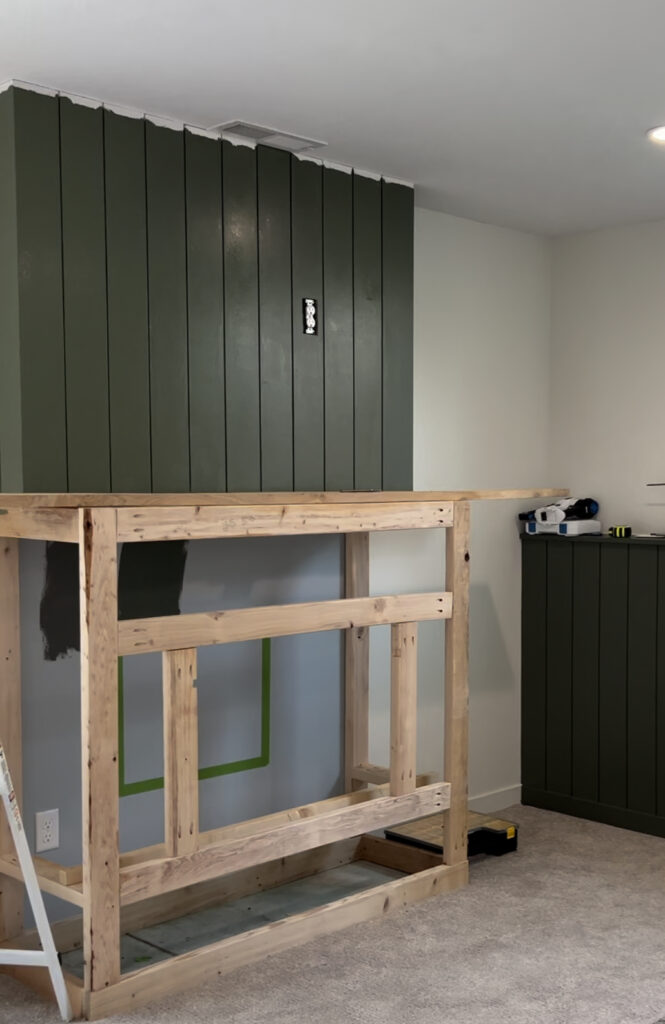
Tip! After building your fireplace base, make sure you slide your insert in the cut out opening to make sure it’s a perfect fit before moving on.
Then I covered the frame with hardy backer board (concrete board) from Home Depot. With the electric fireplace insert we chose, you wouldn’t necessarily need to do the cement board, but we did anyway.
Some fireplace inserts give off heat on the back and sides. Make sure you know whether your insert needs to be vented or not.
Step 2:
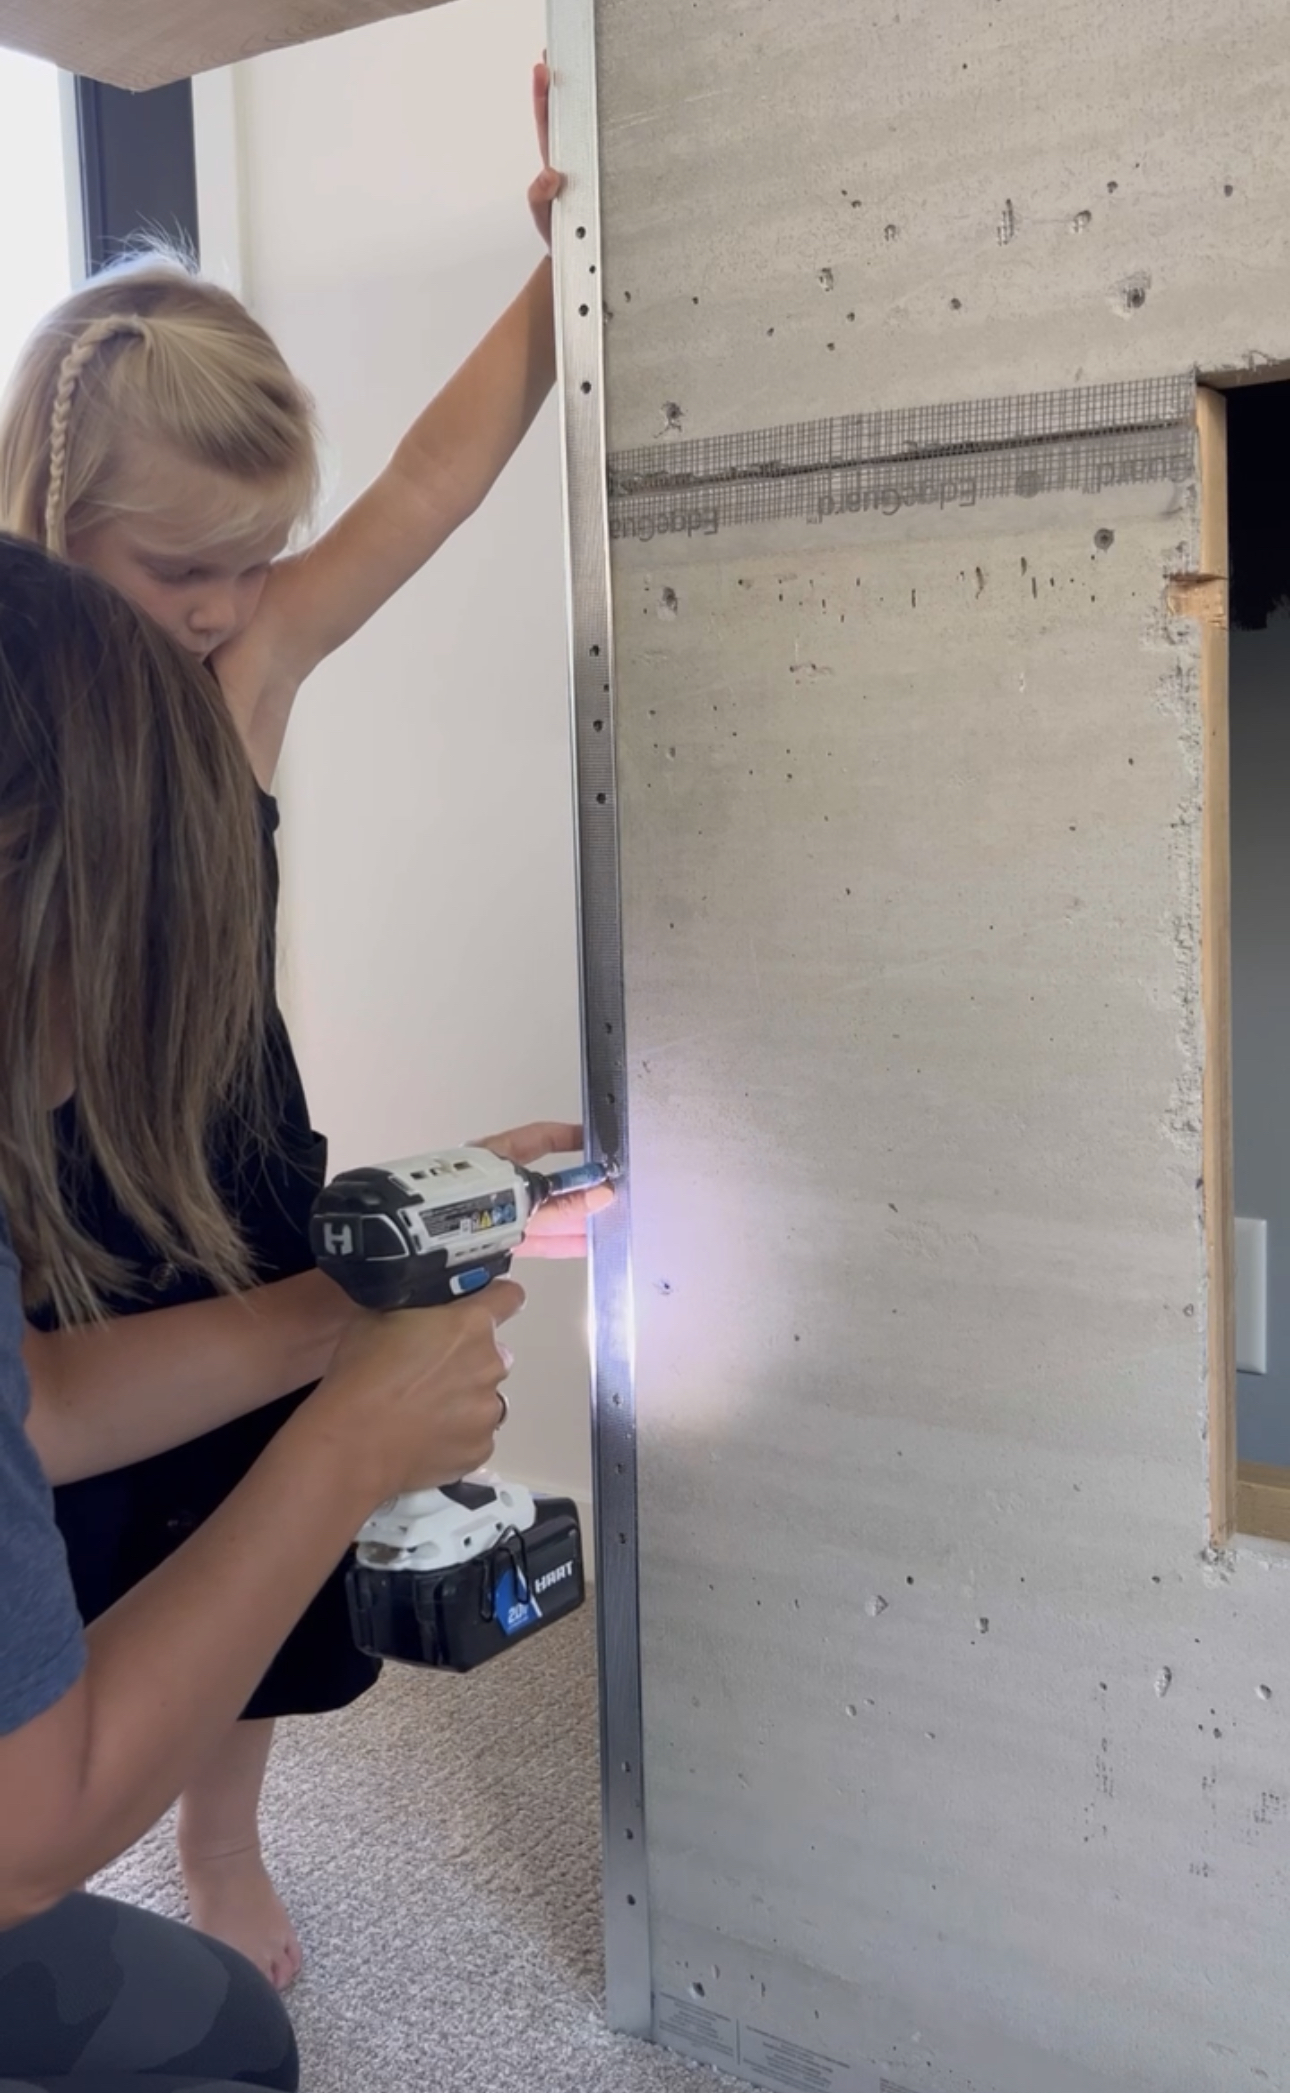
The next step was to cover all of the seams from the separate pieces of cement board with mesh tape. It’s a sticky mesh tape that you just place right over the seams of the cement board. Once you get this part done, go ahead and apply metal corner bead to the corners. This is held in place with screws and ensures that your corners stay nice and square during the process. You can get both the mesh tape and the metal corner bead from any home improvement store.
Step 3:
Mix up your feather finish according to the instructions on the back (it’s very similar to concrete mix), but I strongly recommend mixing small batches. You don’t have much time to work with it before it settles and gets too hard. The best way to mix it is in a large bucket with a drill. The consistency that you are going for is just slightly thinner than peanut butter. You want to be able to spread it on without making a huge mess, but you don’t want it so thick that it doesn’t spread out smooth.
Once it’s mixed, take your putty knife (I found that a 4-6″ knife works best), and apply a thin layer over the entire surface. You will see the seams through the first coat (and possibly even the second), but it will slowly disappear the more you layer on. If you have to mix a second batch for the first coat, make sure you can feather in the edge of the first batch coating with the new one so you don’t have a distinct line where one batch meets the other. If you’ve ever done skim coating, the application for this is similar to that. You’re likely going to need a minimum of 3 coats to achieve the natural look you’re going for. Be prepared for this to take time (but be worth it!).
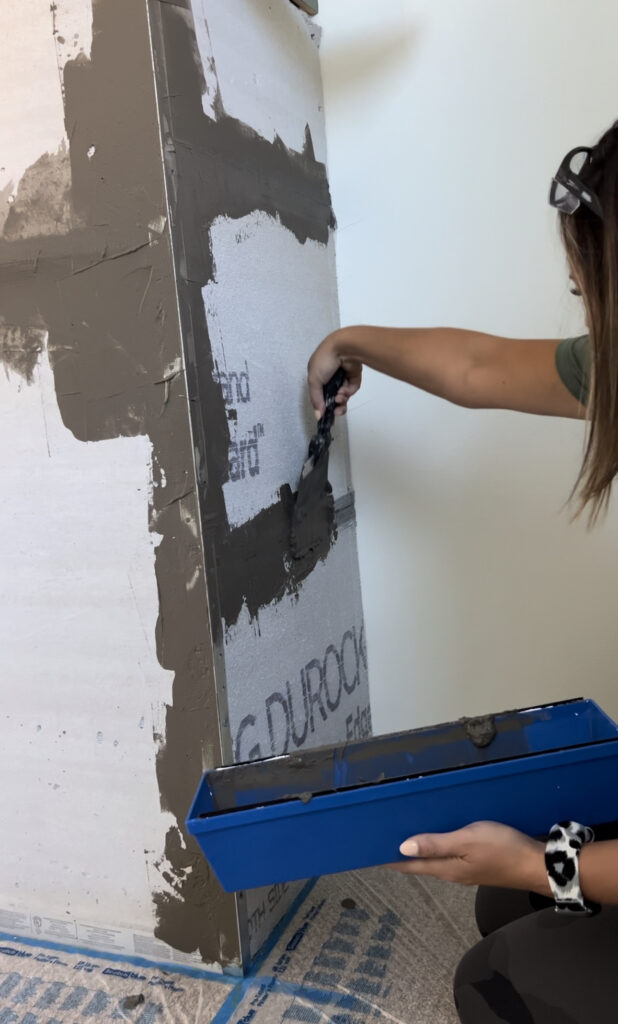
I also want to warn you that the feather finish looks much, much darker when you first apply it than it is when it’s actually dry. Don’t panic, trust the process.
Step 4:
While the first coat is drying, you will want to look over the whole application for high spots or really rough spots that you want to knock down a little bit to keep a nice, smooth finish. This is unless you are going for a very organic, rough finish. You can take a damp sponge to the higher areas while the finish is still drying. Your other option is to wait until it’s completely dry and use a fine grit sandpaper.
I did both of these methods to see which worked better for me, and between coats I preferred to use a damp sponge, but I found that you can’t rub it in one spot too much or you’ll create even more texture. I recommend you only knock down the ridges and seams, and worry about smoothing the entire fireplace down at the end. When you go to do this step after your final coat, I think it’s easiest to use sandpaper to get a flat surface.
Step 5:
When it’s time to apply your second coat, you’ll do it the exact same way as the first. With each coat, you’ll start to see the cement look come to life more and more (which is so motivating!). I loved being able to see the movement that this finish gave the fireplace, and there’s nothing more satisfying than watching it dry and completing your masterpiece. Continue these steps until you’re pleased with the final product.
After your final coat, you have the option to seal the feather finish. I chose to leave it, as I didn’t feel the sealer would be necessary for us. To be honest, I was also concerned about the color of the finish changing with a sealer also.
Faux Concrete Fireplace Cost
The cost of a faux concrete fireplace can vary widely depending on so many factors including the size, whether or not you have an existing fireplace to cover, and the insert/type of insert you choose. Here’s a rundown of what the main materials will cost you:
- Cement Board: Around $15 per sheet (I used 2 sheets)
- Feather Finish: $35- 40 per bag (I used almost a full bag)
- Mesh Tape & Corner Bead: Around $20 total
- Fireplace Insert: $250- 600
Keep in mind that I only needed materials for the bottom half of our fireplace, so if you are doing the faux concrete method on the entire fireplace, yours will cost more.
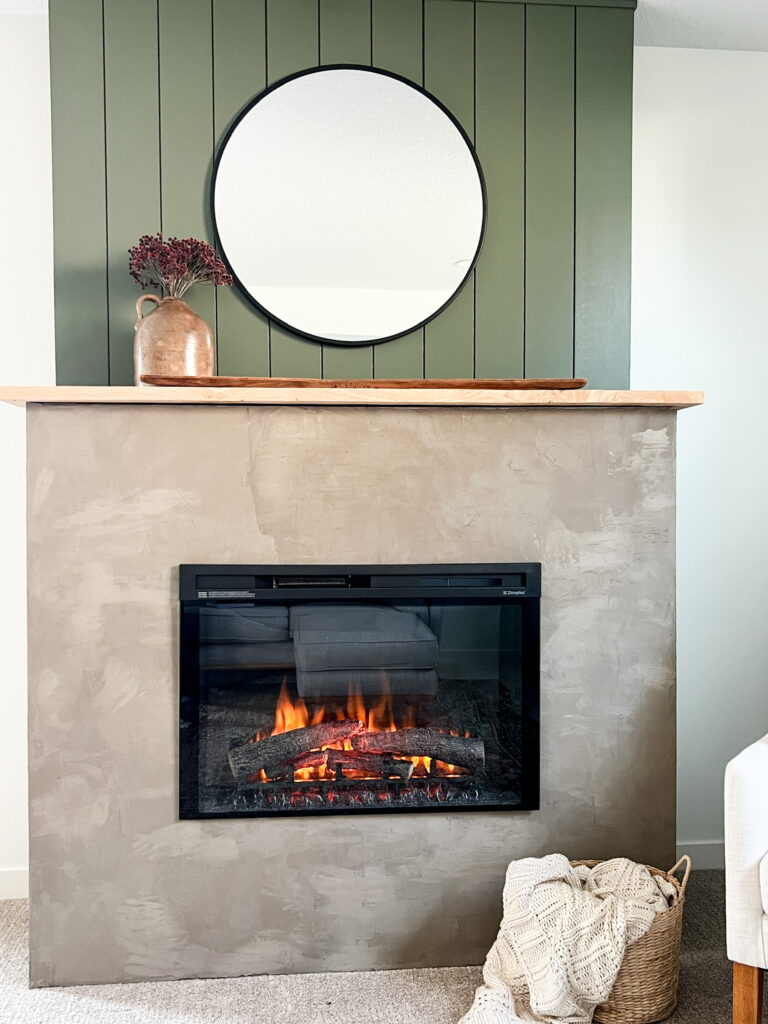
This DIY faux concrete fireplace is a great addition to any home and can really compliment so many different styles. If you decide to tackle this DIY project, I hope you’ll tag me in your finished product @hillhousediaries on Instagram, because I can’t wait to see how it turns out for you!
If you’re interested in checking out some of my other DIY projects, click here.
March 19, 2023

